5 Easy Ways to Fixing Your Broken LED Lights

This article will teach you how to change a headlight/s, fix fractured LED headlights, and change LED headlight bulbs. So, regardless of how seriously damaged or cracked your headlights are, you should be able to discover the answer you need.
How to Change LED Headlights?
It's really simple to change a headlight bulb or any other bulb in your automobile. If at all feasible, we advise performing this task on your own because it is simple and far less expensive than having a garage complete it for you.
What Tools Do You Need?
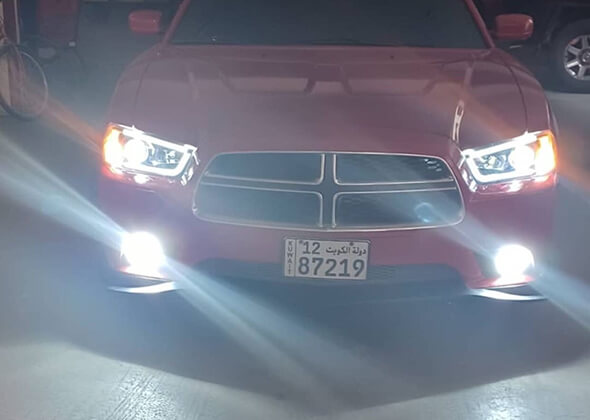
- LED headlight bulbs
- Philips screwdriver
- To handle and clean the replacement bulb, use alcohol cleaning wipes.
- leather gloves
Four Steps for Changing a Car Light Bulb
You don’t have to watch long tutorials to learn how to change a headlight/s. Just follow these steps and you’ll be good to go.
- Locate the headlamp assembly's back first. This is often positioned in a front bumper opening that is accessible beneath the hood. If you're unsure, consult your car's handbook.
- The power wires should then be taken out of the headlamp assembly's rear. Typically, a plastic catch or screw fitting is used to keep them closed. The bulb should therefore be easy to pull free from the assembly at that point.
- The next step is to install the replacement LED headlight bulbs. Use caution when handling it, and rubber gloves are advised to keep fingerprints and moisture off the replacement bulb. To make sure it's clear of lint or any other stains that can decrease its life or affect its performance, wipe it down with an alcohol cleaning wipe.
- Reconnect the wires when the bulb has been installed, and then be sure to test the bulb to ensure that it is operating properly.
Can You Repair Cracked LED Headlight Bulbs?
Do you now know, how to change a headlight/s? but what if the headlights are broken or damaged?
It all depends on how severe the damage to LED headlight bulbs is. If the break is simply a hairline, you might be able to patch it to keep moisture out of the assembly. You'll need to purchase a new headlamp if the fracture is significant.
Here's a simple tutorial on how to fix broken LED headlights if you're sure the crack can be fixed.
What Tools Do You Need?
- Your standard vehicle wash kit shampoo, a sponge, and a microfiber drying towel
- Use a car polish and application cloth to smear the cracked region and the plastic lens.
- Premium superglue, like Loctite Epoxy, or clear silicone sealant both function well.
- Masking tape is helpful to protect the headlight lens's unaffected sections.
- Use a paper towel to wipe away extra glue or sealant.
5 Easy Steps To Fix LED Headlights
Start by thoroughly cleaning impacted LED headlight bulbs to get rid of all dust, filth, and grime. To avoid debris on the sponge producing tiny scratches on the plastic surface, always utilize the two-bucket procedure. Thoroughly dry the area after completing the process.
In a gentle, circular motion, apply a little amount of auto polish to the LED headlights. Applying a generous amount of sealant to the damaged area will smooth out the surface and aid in a solid bond.
Use masking tape to secure the headlight lens region around the damaged location.
Using a sealant gun, apply a thin strip of clear silicone to the crack and remove any extra with a paper towel. Allow this to sit for at least one night. To seal the fracture, you can also use superglue like Loctite Epoxy.
Apply a second coat of polish to even out the surface once the sealant has dried fully. Then, cover the area liberally with auto wax to further preserve it, and polish it to a high shine.
Now you can also answer how to change a headlight/s, and how to fix it.
What Is the Price of a Broken Headlight Replacement?
Depending on the type and model of your automobile, replacing a headlight might cost anywhere from £100 to £750 or more.
LED Headlights assemblies may be costly as well as challenging to locate. Starting with a specialized store like Euro Car Components, which allows you to search for the appropriate parts by reg number, is where we'd suggest going for the greatest pricing.
Changing a Headlight Assembly
If you have the necessary equipment on hand, replacing a headlight component is not all that much difficult. Given how costly new headlights can be, saving money on components and labor by performing work like this yourself is beneficial.
What Tools Do You Need?
- An upgraded headlight assembly
- A socket and wrench set
- Philips screwdriver
Note: Label screws and bolts with little bags and a permanent marker to prevent losing any.
Three Easy Ways to Change LED Headlights Assembly
First, Unfasten The Front Bumper.
Take off the front bumper to reach to headlights. It could seem difficult, but all it takes is a few screws and bolts to be loosened. Furthermore, most plastic bumpers have enough flexibility that you can typically remove the headlamp by just loosening one side of the bumper.
Find every bolt holding the front bumper in place. There are often a few bolts underneath the front of the automobile and between 2-4 under the hood at the front of the engine. For assistance specific to your make and model, internet forums are a viable alternative.
For simple reassembly, be sure to bag and mark any nuts and screws you remove.
Step Two Take Out The Old LED Headlight Assembly
Now the headlamp assembly should be accessible. You can do the following procedures to get rid of the damaged headlight.
Utilizing the plastic connector catch, cut the bulb cables.
Loose each screw keeping the headlamp assembly in place. Typically, there are two screws on top and one screw at the bottom of each screw. Depending on how your automobile it, you might need a good long screwdriver to reach the bottom screw.
Be cautious to ensure that the cable connectors are correctly detached and out of the way when you slide the old headlight assembly outward in your direction.
Step Three Install New Headlight Assembly
It's now time to install the new headlamp, which just requires that you go back through the initial process and double-check that everything is secure and reconnected.
- Remove any dust and filth from the region where the new headlight will be placed.
- Make sure that every connection is secure before installing the new headlamp.
- Don't forget to test the headlight and reattach the lightbulb cable.
Make that the headlight beam is at the proper height when dipped before fully reconnecting the bumper. Make sure the screws are set so that the beam is the same height as the other headlamp since they may vary the height of the beam.
Final words
If you’ve read the article thoroughly then you have the answers for
- How to change a headlight/s?
- How to fix headlights?
- How to assemble headlights
Request a quote now to get High quality and new LED headlights for your car.
Happy repairing!